Jammy oats

IMG_8324 copy

I’ve got back onto the baking train. But I don’t know if I ever got off. It’s more like, I fell asleep on the train, drooled for a bit, and woke up with a dead arm.

I wont lie to you and I wont be modest: I’m good at baking, I did a lot when I was 15 but I got a bit sick of eating baked stuff, and I probably will again this time round, but whilst I’m awake on the train, I may as well bake as much as possible.

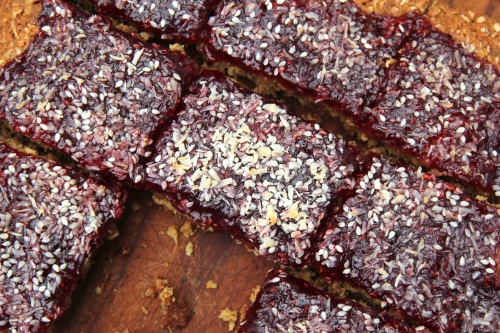
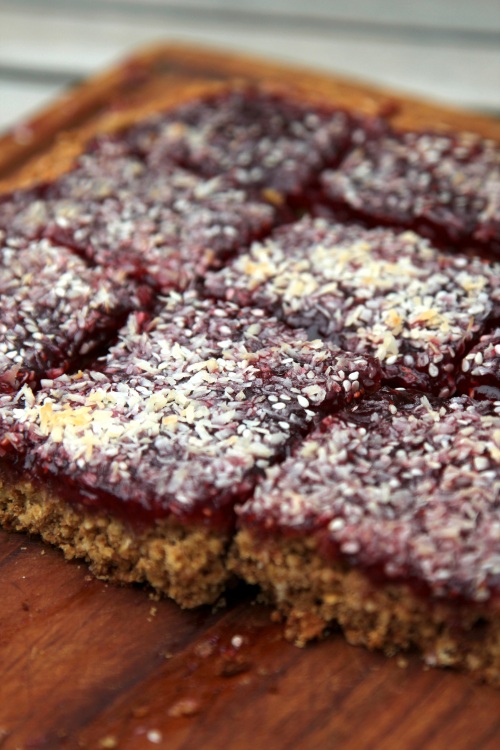
Got a great raspberry recipe here if you like raspberries, or jam, or oats. Or jammie dodgers. These taste a lot like Jammie dodgers, so they have that real nostalgic feel.

I was inspired by this recipe, however, I didn’t have half of the healthy/vegan ingredients she had. So mine are a lot easier to make with regards to seeking out ingredients. And they probably taste a lot more indulgent (and thus nicer).

IMG_8328 copy

Ingredients-Yield-9 BIG Squares

-1.5 cups of oats

-1 cup of flour

-1/2 tsp bicarbonate or soda

-1/2 tsp salt

-1 egg

-1/2 cup of brown sugar

-1/2 cup of butter melted

-1/4 golden syrup

-2 tbsp milk

-1 cup of raspberry jam (or a jam of your choice, I used naturally sweetened St. Dalfour raspberry jam).

-2 tbsp sesame seeds/dessicated coconut, or a mixture of the two.

Method

-Preheat your oven to 180 c./gas mark 5 and line a 9 x 9 square baking tin with greaseproof paper. Failing that (cos I did) just line a regular-sized baking tray, but be prepared to use your hands to form a square.

-Mix together your dry ingredients (oats, flour, sugar, bicarb and salt) in a large bowl.

-In a smaller bowl, combine the wet ingredients but not the jam (egg, syrup, butter and milk).

-Mix together the wet and dry ingredients in the large bowl until sticky and well-combined.

-Now smooth your mixture into your square tin, if you’re without a square tin, form a square with your hands, making sure the mixture is about 1/2 inch high and homogenous.

-Spread the jam over the top of your square and sprinkle your sesame seeds/coconut.

-Bake for 30 minutes until firm and jam has relatively set.

IMG_8339 copy

Leave a comment

Filed under Baked goods, Store Cupboard

I want it to be SUMMER salad!

IMG_8283

OHHAYIMBACK. With a vengeance. Or vindiction, cos where the HELL is the British summer? I did not leave the Med for this.  It’s ridiculous cos June in London is at least warm, but it’s not even warm, I’m still wearing my parka. Everything I wanted to eat, like summery stuff, doesn’t really seem suitable.

I mean, come on.

IMG_8298

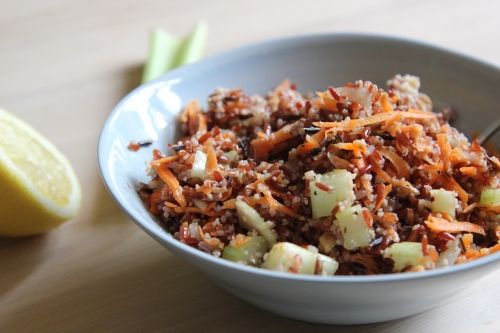
This salad seems just as ridiculous. It’s looking at me like: Why did you make me? It’s not hot enough to have a refreshing salad.

But so what, I made it, I ate it, it was really good.

My mum even thought it was good. She refused to eat it at first cos she has that ‘carbophobia’ mindset of the 80s, but then she took a taster at the end of the meal and she was like ‘OH THAT IS JUST DELICIOUS’. That showed her. 

Ingredients-Yield-2-3 Cups

-140g red rice

-60-80g couscous

-1 onion

-1 clove of garlice

-1 stick of celery

-1 carrot

-a small handful of chopped walnuts

Dressing

-1 shot glass of walnut oil (or olive oil)

-1/2 shot glass of white wine vinegar

-juice of 1/2 a lemon

-1 tsp sugar

-1 tsp salt

Method

-Cook the rice and couscous to package directions.

-Whilst the grains are cooking, chop your onion and garlic, then fry with some olive oil until super soft. Season. Add to a salad bowl.

-Chop the celery to small pieces, and grate your carrot. Add to the salad bowl with the cooked grains.

-To make your dressing, mix all the dressing ingredients together.

-Pour dressing over the salad and mix well. Done.

IMG_8305

2 Comments

Filed under Grains, How to be Healthy

I don’t even like bananas that much…

IMG_4667

So like, this was gonna be a great comeback post with TWO banana recipes, Banana Clusters and Banana Bread. However, although the banana bread (made with dates AND walnuts) was delicious, when I turned it out onto the cooling rack, a bit of the bottom fell off, and I didn’t wanna take a photo of a bloody ugly cake. So yeh, just one banana recipe. Soz.

The reason I have so many bananas is because my parents, my mum, seem to still be buying food for 5 people when actually there are only 2 of them, neither of whom eat bananas. So I came back for a week from France to find, amongst eggs dating back from September and hummus from January, 9 over ripe bananas.

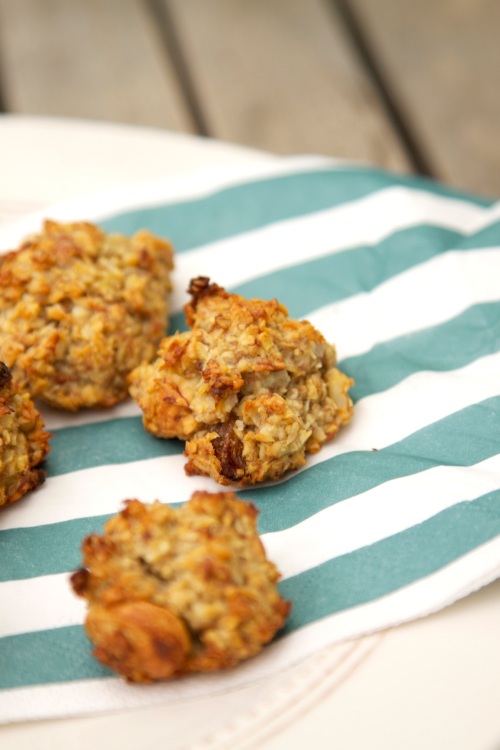
‘WE GOTTA DO SOMEFING WITH THESE BANANAS’ me and my sis said. So I made these Banana coconut clusters and banana bread.

IMG_4654

Now my house smells like bloody bananas.

IMG_4670

BANANA CLUSTERS

Ingredients

-1 cup of porridge oats, 1/2 cup of porridges processed to rubble (don’t worry if you can’t do this)

-1/2 cup of ground almonds, or another type of nut

-1/3 cup of desiccated coconut

-1/2 cup of sultanas (or chocolate chips???)

-1/4 cup mixed nuts (optional)

-1 tsp baking powder

-1 tsp vanilla essence

-1 tsp ground nutmeg

-3 very ripe bananas

-1/4 cup of melted coconut oil

Method

-Pre-heat oven to gas mark 5 and line two baking trays with greaseproof paper.

-Mix together all the dry ingredients in one bowl, and mix together all the wet ingredients (the banana, vanilla essence and coconut) in another one.

-Add the wet ingredients to dry ingredients and mix reallly well.

-Make your clusters. I used about a teaspoon for each cluster, and placed them on the baking tray. I think it was about 9-12 clusters on each tray.

-Cook for about 20 minutes, or less depending on your oven, until golden brown and firm to touch.

-Leave to cool, this will allow them to firm up.  ANNJOYYY BON APPETIT.

2 Comments

Filed under Healthy Sweets, Snacks and Starters

Festive Frugal Fudge

016ed

There is absolutely nothing festive about this fudge. You can make it in any season you like, but that doesn’t matter, I like alliteration and thus this is called festive fudge.

I hope all your Christmases were lovely and full of great things. I myself had probably one of the best Christmases on record. It marked a positive contrast from last year’s bleak period of injury and exams. This Christmas I still have backpain but I have no exams. YAY.

105

The weather was GRIM on Christmas day, but as long as it didn’t snow I was very happy. It was very Londonny and grey, which is what I like. Got a bit sopping wet on my run but it was invigorating. Our Christmas meal was of course a traditional one with all the trimmings. Us vegetarians had nutroast, which was so filling and I just got really full and felt like a pregnant lady. It unfortunately meant that I couldn’t have the fudge as a post post post post post meal treat. (I ate a lot).

Anyway, I have never made fudge  before. I thought it was very beyond me. I thought ‘it’s a SWEET, don’t you  need thermometers for that sort of craziness?’ No. It turns out. This salted caramel fudge was pretty darn simple. ENJOY.

018ed

Ingredients

-400g caster sugar

-125 g butter

-1x 397g can condensed milk

-100ml milk

-2 tbsp of golden syrup

-Salt crystals

Method

-Prepare a small baking tin with greaseproof paper.

-Melt all the ingredients in a pan on a low heat, stirring constantly.

-Bring the mixture to a boil, continuing to stir. It should start boiling ferociously, and which point you should be prepared to…you know, just be prepared.

-Take off the heat completely at this point. YOU KNOW ITS READY WHEN YOU DROP A BIT INTO ICE WATER AND IT SOLIDIFIES INTO A BALL OF FUDGE. 

-Once off the heat, beat the mixture with a wooden spoon continuously until it comes away from the side and is very thick. This could take up to 10 minutes.

-Pour the mixture into your baking tray and smooth down. Sprinkle salts crystals on top, and press down with the back of a spoon to push into fudge mixture.

-Place in fridge for up to four hours, when it then should be ready to eat. Store in the fridge.

2 Comments

Filed under Desserts

Merry Noël (Christmas Crackers)

Hello. I haven’t written in a long time because I am lazy and fresh produce in France is actually not great and I am lazy. Thus cooking creatively isn’t high on my to do list. I still like food though so don’t worry. I have had a lovely first semester in France, it’s been great, I’ve met great people and the weather has been great. What I have realised mostly this semester is that the French are slim because the food is too expensive. It’s been hard going from Leeds to Montpellier, where sweet potaotes are about 2 € per ‘patate’. Mayynnnn.

017Christmas in France is not necessarily the same as Christmas in the UK. I feel they do the façade  they do the lights and the Christmas market. BUT IT’S NOT THE SAME. That’s why I am very happy to be back in London and celebrating Christmas here being jolly and eating. It sounds so cliché, but now it feels like Christmas.

If you were ask me how France has changed me, I’d say that I am now a cheese and coffee snob.  I nothing-ed coffee before I came to France, but now I have an obsession with good coffee. No instant please. I loved cheese beyond all measure before I came to France, but the obsession has since increased. To share this obsession, I brought back more than 1 kg of French cheeses, including this one, a Brie with a line of 5 berries down the middle. I love cheese.

Xmas 2012 087ed

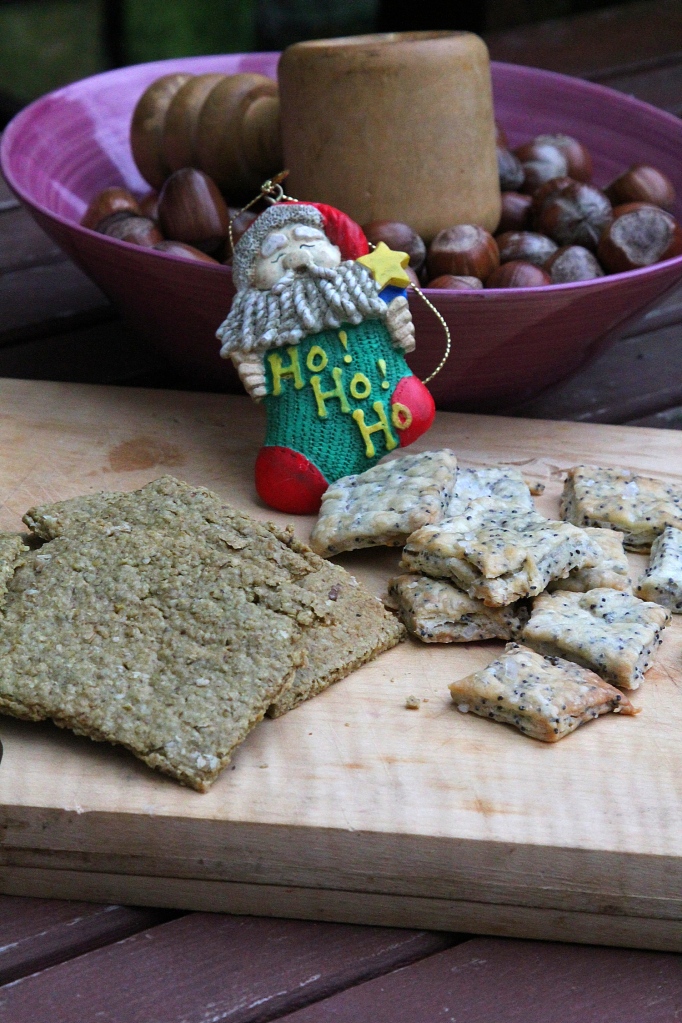
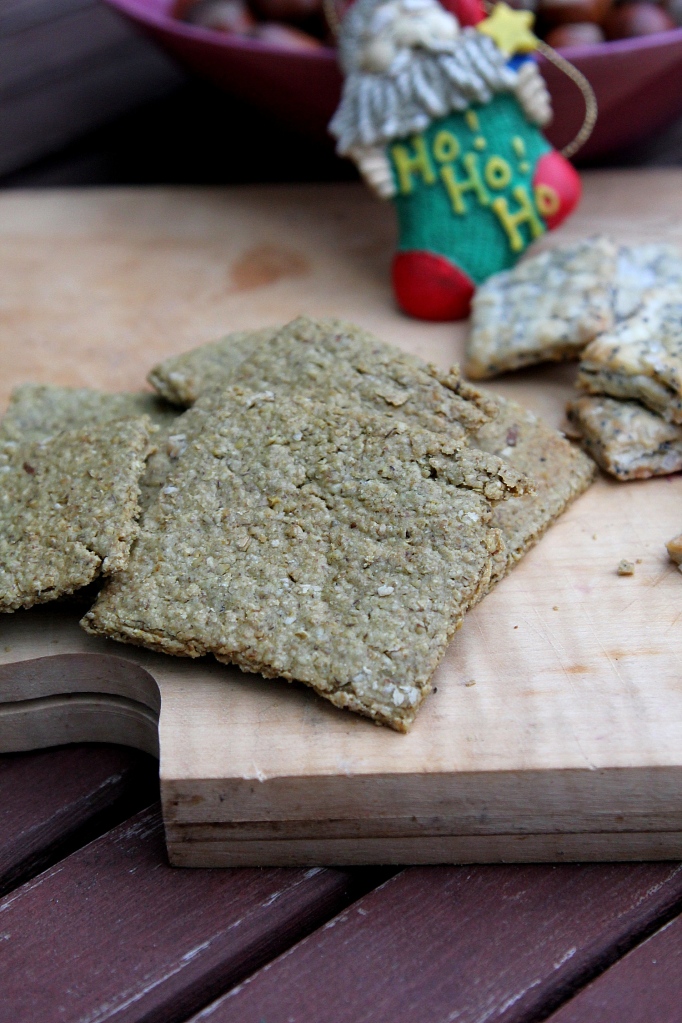
SO THEREFORE, it only seemed suitable that I made crackers for the cheese. I made poppy seed crackers. And because my sister can’t eat flour I also made oatcakes. Yummy. Everyone please have an amazing Christmas, or enjoy your holidays!

Xmas 2012 071ed


Poppy Seed Crackers-makes 20 crackers-adapted from this

Ingredients

-1 cup of plain flour

-1 tsp salt

-1 tsp sugar

-1 1/2 tbsp cold butter, diced

-1 tbsp poppy seeds

-5 tbsp milk

-Salt crystals

Method

-Sieve the flour salt and sugar into a large mixing bowl.

-With your fingers, crumble together this mixture with the diced butter until it resembles very fine breadcrumbs.

-Add the poppy seeds and milk, and with your hands, start to knead the mixture together to form a soft dough ball.

-Wrap in cling film and put in the fridge for at least an hour.

-Pre-heat oven to gas mark 2/300f/150 c and line a baking tray or perhaps two with baking parchment.

-After an hour, unwrap dough and lightly dust a surface and rolling pin with flour. Roll out dough until about 5 mm thick, then cut shapes. Place shapes on baking sheet, brush lightly with milk and sprinkle salt crystals on top.

-Place in the oven for half an hour, making sure to keep an eye on the crackers. Once browned and the base feels firm, take out and leave to cool.

Xmas 2012 079ed

Oatcakes-makes 20 oatcakes

Ingredients

-200g rolled porridge oats, processed to make oatmeal.

-1 tsp salt

-1 tsp bicarbonate of soda

-2tbsp butter

-1/4 pint of boiling water

Method

-Mix together the ingredients apart from the water.

-Add the 1/4 pint of boiling water slowly whilst using a spoon to bring the ingredients together to form a moist ball. DONT do what I did, and be abstemious with the water, use all of it otherwise the ball will fall apart.

-Wrap in cling film and place in fridge for at least an hour.

-Preheat oven to gas mark 5/375 f/190 c and line two baking trays with baking sheets.

-After at least an hour, unwrap dough and place on a surface dusted with porridge oats. Using a rolling pin also dusted with oats, roll out the dough as thin as possible, being careful not to break the dough too much.

-Cut your shapes and place on the baking sheet. Brush with milk (if at hand) and place in oven for 30 minutes, or until the cakes are hard and starting to brown a tiny bit. Take out and leave to cool.


Leave a comment

Filed under Bread, Pastries and Pizza, Snacks and Starters, Store Cupboard

OH HAY.

No posts depuis longtemps, je suis desolée. I’ve been too adventurous with my cooking to warrant a point less post about how to make toast or something like that, so apologies. France has been incredible so far, really exceeding my expectations. I know France well, I’ve been to France every year of my life, but living here is a lot different. It’s very cool.

The food is good, we’ve been out a few times, mostly to the same burger restaurant. It’s not easy being a vegetarian AND a student in Montpellier, there are restaurants which aren’t French, of course, but most are French. And the French don’t do vegetarian. We’ve got pizza, and like I said there’s this amazing burger restaurant that we can’t get enough of. Just thinking about it now…I’m gonna have to go back. I wont drone on about restaurants that you can’t visit, but hey, if you want advice come to me.

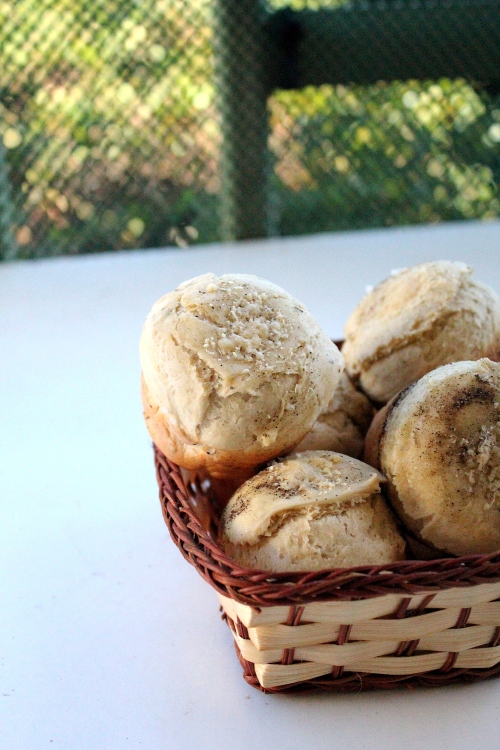
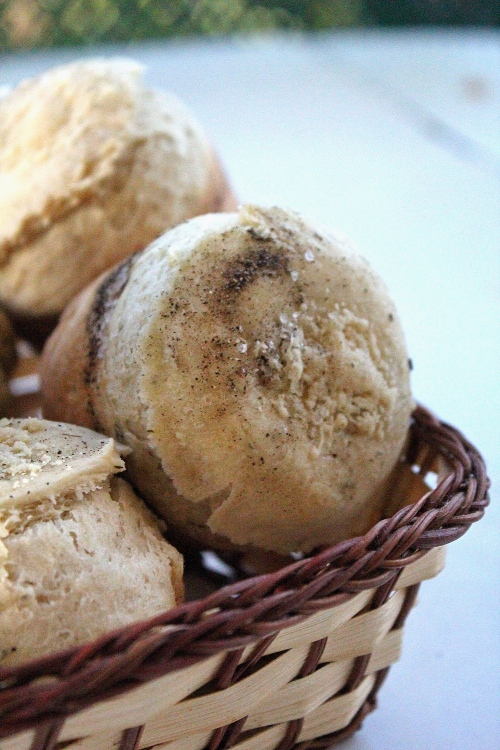
These buns came about by accident. I was helping my house make pizza dough, and she had lots of YOW (yeast oil water) mixture left. She suggested that we make some sort of bread so as not to make the yeast, and this is what I came up with? It’s basically BIG DOUGH BALLS. They taste Italian and bready and are darn good with some butter, and maybe something more exciting…

Ingredients

-250ml warm water

-1/2 sachet of yeast

-2 tbsp oil

-2 cups of flour

-salt and pepper

-Parmesan (optional)

Method

-Mix together the water, yeast and oil, and leave to sit for a couple o’ minutes.

-In a bowl, start to mix the YOW mixture in with the flour and a tsp of salt, using a fork. When the fork becomes redundant, use your hands to knead the mixture. Knead for 5 minutes, the dough should be silky and slightly sticky. If it’s too sticky, add some water.

-Leave to rise for 1-2 hours in a warm place. While that’s happening, pre-heat oven to gas mark 6, grease a 6 case muffin tin.

-After the dough has risen, punch it down, knead a bit more and separate equally into 6 balls, placing each one in a case.

-Top with salt crystals, pepper and some parmesan and bake in the oven for 40 minutes or until when you tap the base of the buns, they sound hollow.

Leave a comment

Filed under Bread, Pastries and Pizza

Something I forgot to post before I went to France.


Montpellier is rilly fun. It’s really French, everyone walks around carrying baguettes, and the cheese and wine is really cheap. It’s been really warm and hot, but there is a chill in the air now (23 degrees) so beach trips are probably gonna have to stop taking place. This is a food blog so I should probs talk about the food and not the heat and my tan. Urm, well, in the excitement of moving I haven’t had that much time to dedicate my time to cooking. I’m very content to eat cheese, salad, lentils, cheese, bread and raped carrots. The hummus here is awful, it’s so bland and overpriced. They do sell Yarden, but it’s about 4 euros for a pot. It makes me sad. I could make my own, but the 30p chickpeas I get in Leeds are hard to come by as well. Too much hummus talk.
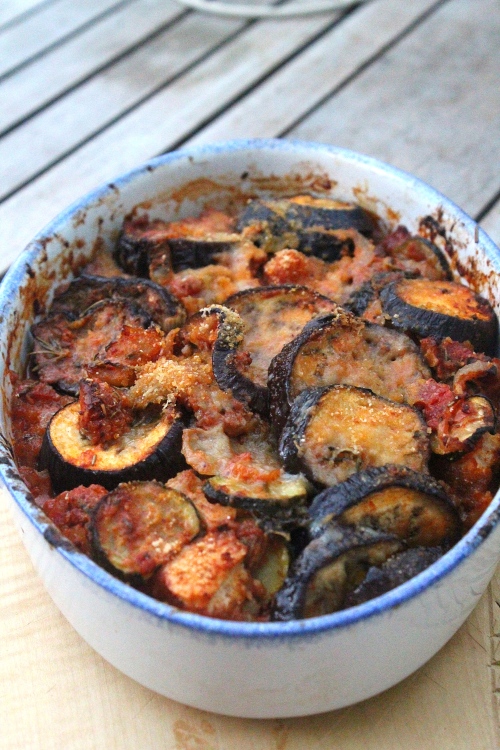
 

It’s a shame I didn’t write this post when I made the meal because now I have completely forgotten the method of how to make it. I remember making it, eating it and liking it, and the memory in my mind should be enough to help me recreate the recipe 3 weeks later. It’s so basic that it doesn’t matter if I go a little off course. It’s basically an aubergine parmigiana. Just aubergines, tomatoes and parmesan. Yum.

What I really hate is when people are like ‘I dislike aubergines, they’re too spongy’. It’s a common sentence I hear. Fair enough if you don’t like aubergines because of the taste (even if that’s a bit weird), but if you dislike aubergines cos they’re spongy, then it means you haven’t cooked them properly. It’s equivalent to saying ‘I hate raw eggs, they’re so gloopy’. Correctly cooked aubergine is not spongy. And I will tell you how to cooked aubergine properly here and now. Ici et maintenant.

Ingredients

-3 aubergines, sliced into medallions.

-1 tin of chopped tomatoes

-1 onion, chopped

-1 clove of garlic, crushed or chopped

-handful fresh basil and rosemary, or 2 tsp of both  dried basil and rosemary

-1 heaped tsp sugar

-100ml water

-150-200g parmesan grated

-100g of breadcrumbs

-olive oil

Method

-Preheat oven to gas mark 6, 200c  and grease the inside of a large casserole dish.

-Okay, here’s what to do with the aubergines. Sprinkle your medallions with a generous amount of salt. But not too much. Leave them for at the very least 15 minutes. I tend to do this in the morning, put them in the fridge and then come back later but that’s cos I’m lame.

-Wanna know what this does and why it’s important? Aubergines are very watery, like courgettes and strawberries. So normally what happens when you cook aubergines is that they swell with all the moisture that’s trapped inside them. They’re like a sponge, they just have so much water in them. Hence why people say they’re ‘spongy’. Salt, as you probably know, draws the moisture out of the aubergines. It basically draws out all liquid from them, leaving them with their distinctive flavour with no water masking it. This means that when you cook aubergine they have just their flavour and they also absorb the flavour of whatever they’re cooking with, making them delicious. There. Salt is important.

-While your aubergines are left to sit, make your tomato sauce. So fry up your onions and garlic in some olive oil and salt. Once the onions have softened add your chopped tomatoes, water, herbs and sugar. Give it a taste, it might need a bit more seasoning.

-Bring the sauce to the boil and leave to simmer for 10 minutes.

-While the sauce is simmering, and if the aubergines have been sitting for the correct time, it’s time to wipe down the aubergines. With a dish cloth, just wipe away the water that the aubergines have released. Don’t use a kitchen towel, other wise you’ll have bits of kitchen towel in your aubergines.

-Once you’ve done that, it’s time to start layering. Place 1/3 of the aubergines on the bottom layer of the casserole dish, top with a 1/3 or the tomato sauce, and then 1/3 of the parmesan. Do the same for the next two layers (i.e, until you’ve finished your ingredients).

-Top with the breadcrumbs, and  a bit more parmesan if you’ve got some to spare. THEN, pour olive oil liberally (I’m thinking 3-4 tbsp) over the dish. I’m not trying to be all American and make it unhealthy, but it gives that extra something the aubergines can absorb.

-Place in the oven and cook for 1hr and a half, if it looks like the top is burning, cover with foil. I cooked mine for ages just so the aubergines almost disintegrated into nothing when I prodded them. You know it’s ready when the top has browned, and when you poke a fork into the dish, it’s REALLY SOFT.

-Bon appetit.

Leave a comment

Filed under Italian, Vegetarian

My Cheapest Recipe Yet: Thrifty Thlatbread

AND SO, I’m off tomorrow for my year abroad. I’ve  been through every emotion possible. Fear, excitement, apprehension, apathy, confusion and now I just cannot wait! I’m just so ready to live in France. YAY. I will continue to blog, I hope, but I foresee that the next year will include me eating bread, cheese, and carrot remoulade so I can’t imagine I’ll be doing a whole lotta cooking. But I’ll try!

This flatbread was so GREAT to make and it is the cheapest recipe I’ve ever posted. FACT. And it is probably the easiest, but that’s subjective.

Have you been watching Best British bake off at all? I have. Well I’ve watched two episodes, and in one of them they have to make flat bread. So I was like: Yeah, well I CAN MAKE FLATBREAD TOO. I don’t know why I wanted to make flatbread so much, we all know my trouble with  bread making. But I was determined. Turns out flatbread is pretty easy. Well this flatbread is…

Ingredients-Makes 6 flatbreads

-250g plain flour, plus more for dusting.

-150ml warm water

-1tsp salt and 1 tsp olive oil

Method

-Mix the ingredients together in a bowl. Once the dough comes together use your hands to work the it a bit. You want the dough to be slightly dry, but not crumbling apart.

-Dust a surface with flour, then dust your rolling pin.

-Pull a small handful off your dough, and roll out as flat as you can into a ‘flat’ shape. (This isn’t a beauty contest, my flatbreads don’t have any distinguishable shape).

-Fold the dough in half and roll flat. Fold the dough over again and roll flat. This traps air into the bread thus allowing it to puff up.

-ROLL THE DOUGH AS FLAT AS POSSIBLE. I wanna stress how important this is. It does require some elbow grease as the dough is tough, but really really try. Put the flatbread on a plate and dust with flour. Repeat with the remaining dough until finished, dusting between each flat bread.

-Heat up a flat frying pan till it’s very hot (you’re dry frying the bread). Place one flat bread and continue turn every 30 seconds until the bread has puffed up and looks about done. Do this with your remaining doughs.

Leave a comment

Filed under Bread, Pastries and Pizza

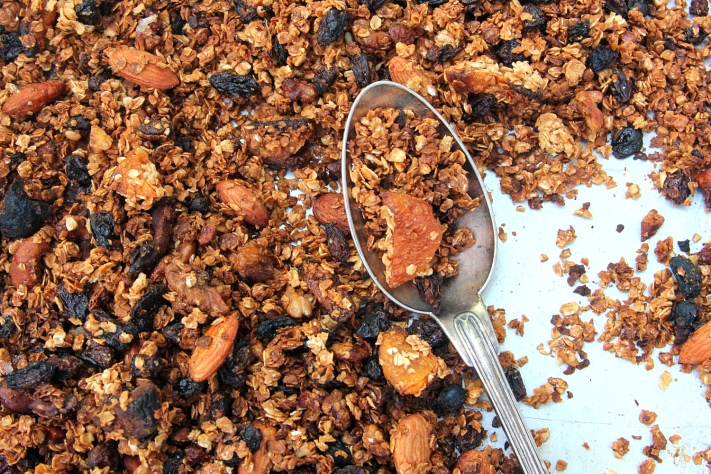
Gold Granola

LOOK I’VE MADE AN OLYMPIC-THEMED DISH. I love the Olympics. It took quite a few days for the Olympic mood to kick in, but now I’m in love. It’s ironic. We’re watching athletes throw up and rip their muscles apart (well, except for shooting and archery-WHAT NON-SPORTS), claiming that we love sport…yet we do all this while sitting on the sofa and doing nothing all day. I have managed to keep a good balance, I do a good run/swim/gym as soon as I get up and, being slightly employed/unemployed, I can just sit on the sofa and knit all day with whoever wishes to join me. It’s a shame, I guess, that I didn’t get tickets, but I’m living in the goddamn city. You can definitely feel something in London which I doubt you can get elsewhere in the country. Maybe it’s because I live at the bottom of Ally Pally, where the Dutch team are located, so every night when I look out my window I see this bright orange-illuminated building. Or maybe it’s because everytime you step outside EVERYONE is sporting some sort of national sports jersey. It seems everyone also has a union jack flag just sticking out from their rucsacks. Hmmm, who needs tickets?

I have seen many a granola recipe in my time. I have EATEN many a granola recipe in my time. But MAKE granola? Mehhh, it was never very high on my to-make list. But granola is so pretty when it’s made and just sitting in a jar. It then also looks really nice as a present.

I was always quite turned off it because of the high sugar content, because it’s made of maple syrup, most of the time. However, I (my parents) purchased some agave nectar because I wanted to try and do some healthy baking. That is what made me want to make my own granola. Turns out it is probably the easiest thing in the entire world. And my mum EATS IT (my mum rarely eats anything). I’ve made two batches in the space of 1 week! It’s getting hoovered up. So a healthy granola that is ridiculously healthy? I give it the GOLD MEDAL.

Ingredients-Yield is about 1.25 litres (adapted from this)

-3 cups of porridge oats

-1/2 cup of agave nectar

-1/2 cup of almonds

-1/2 chopped walnuts

-1/2 cup of dried apricots

-1/2 cup raisins/sultanas

-1 scant tsp of salt

Method

-Preheat oven to 300 f, or around gas mark 5. Line a large baking tray with grease proof paper.

-Mix all the ingredients together in a large bowl. Make sure it is very well combined.

-Spread out onto the paper, making sure it is as spread out as possible.

-Put in the oven for 30 minutes, stirring from time to time. Be careful not burn.

-Take out from oven when it looks like most of the porridge is browned.

-Leave to cool, and then put an airtight container.


Leave a comment

Filed under Healthy Sweets, Store Cupboard, Vegan, Vegetarian

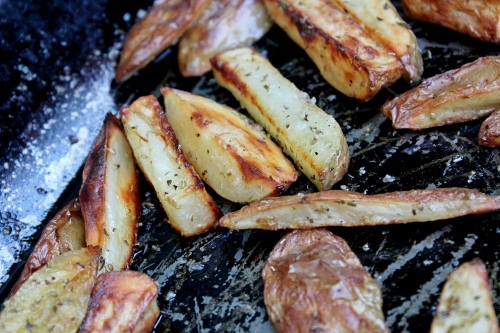
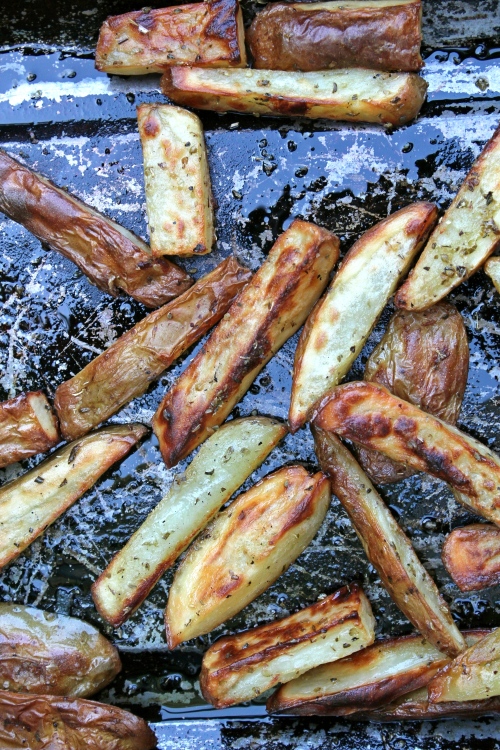
CHIPS.


Soooo chips.  As a child, it was all about chips. At a restaurant, I would always have chips. I was that annoying child at a very reputable restaurant…getting just a plate of chips.

Now I have to admit now, that these were not for me. These were for my dad.  My overdosing on chips as a child has meant that I don’t really eat them these days (it’s the same with crisps and juice). I also see little point in having white potato, when you could have sweet potato, whose complex carbohydrates are much more preferable. But my dad doesn’t like sweet potato.

But of course I had a try of these potatoes, as I do with all my dad’s veggie friendly accompaniments, and they were delish.ous.


What I love the most about them is that they’re just SO  FRICKEN EASY.

Ingredients-serves 2

-4 large king edward potatoes, around 600g

-2 tbsp oil

-1 tsp salt

-1 tsp dried oregano

Method

-Pre heat oven to gas mark 7, 220 c.

-Chop your potatoes in to chip shapes. This involves chopping potatoes in half lengthways, and then halving each half. And then chopping each sigment into thirds. If that doesn’t make sense, just use your initiative.

-Place potatoes on a baking dish, pour over oil, salt and oregano and stir together thoroughly to make sure all potatoes are covered.

-Place in the oven, for about 50 minutes, or until the potatoes are brown on the outside, and when you poke a fork through a chip it is soft.

Leave a comment

Filed under Store Cupboard, Vegan, Vegetarian